
Documentation Index
Fetch the complete documentation index at: https://docs.elitea.ai/llms.txt
Use this file to discover all available pages before exploring further.
Agent Canvas Feature: Visual Agent Management
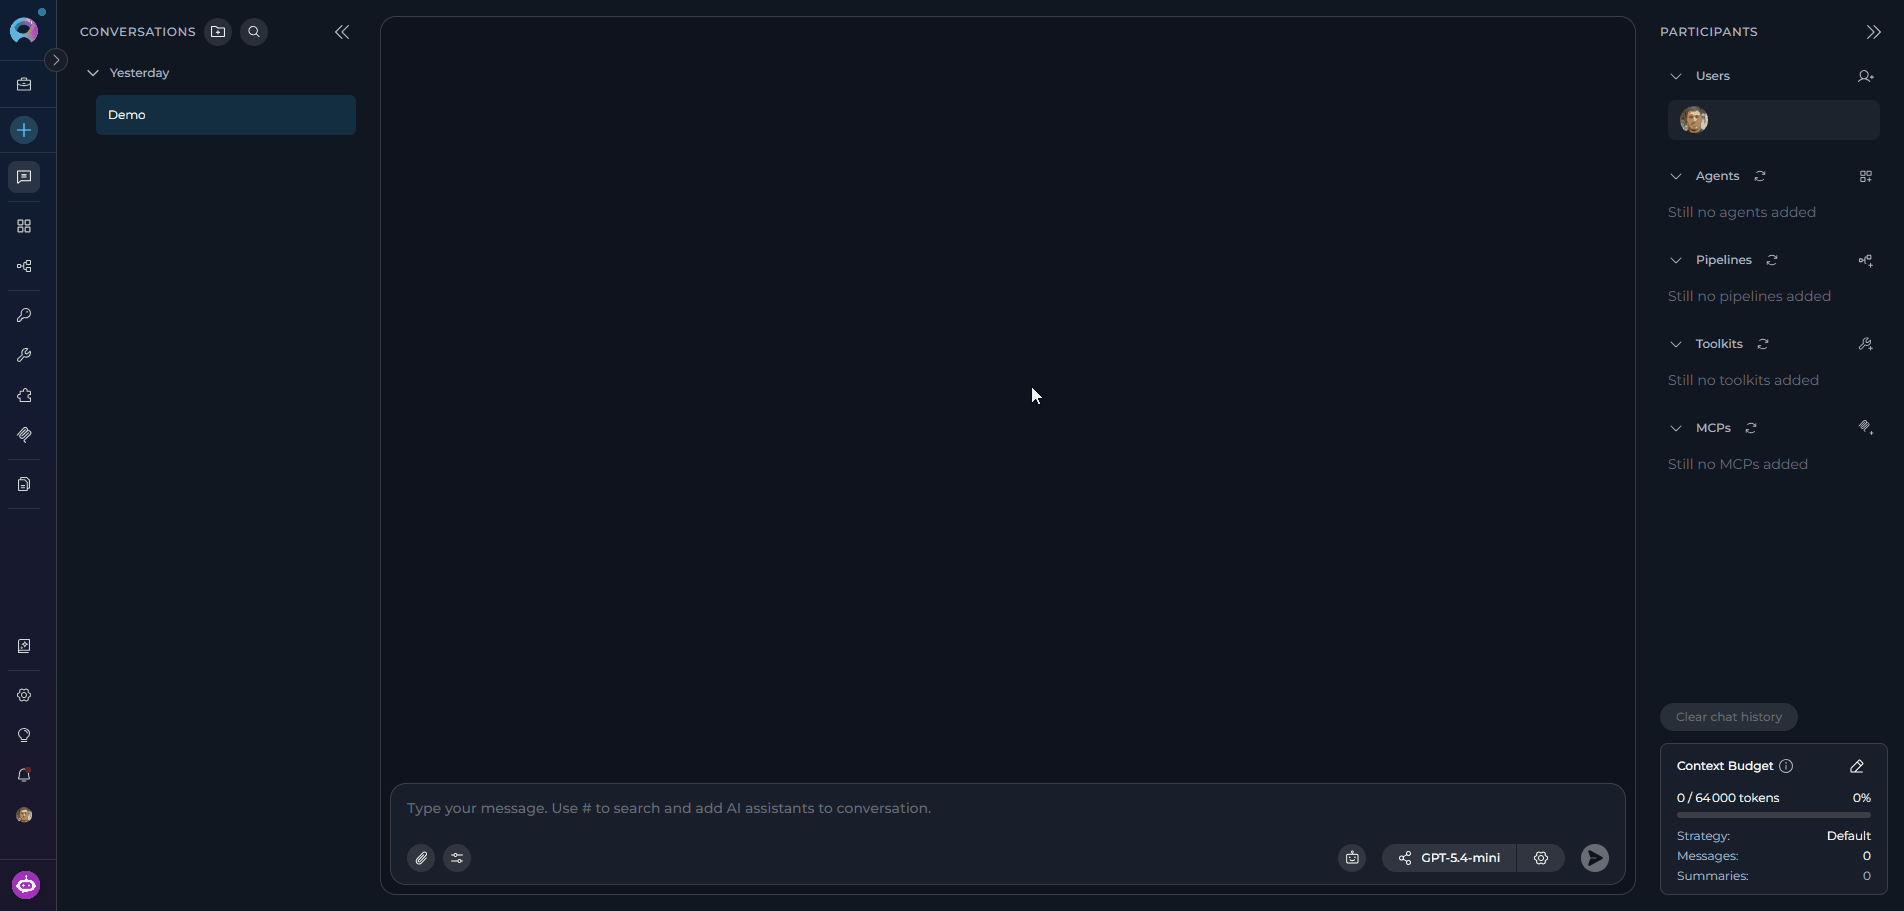
The Agent Canvas interface in ELITEA serves as an integrated agent management system accessible directly from the chat interface. This feature enables you to create, configure, and manage AI agents without leaving your conversation context, streamlining your development workflow.Integrated Chat Experience
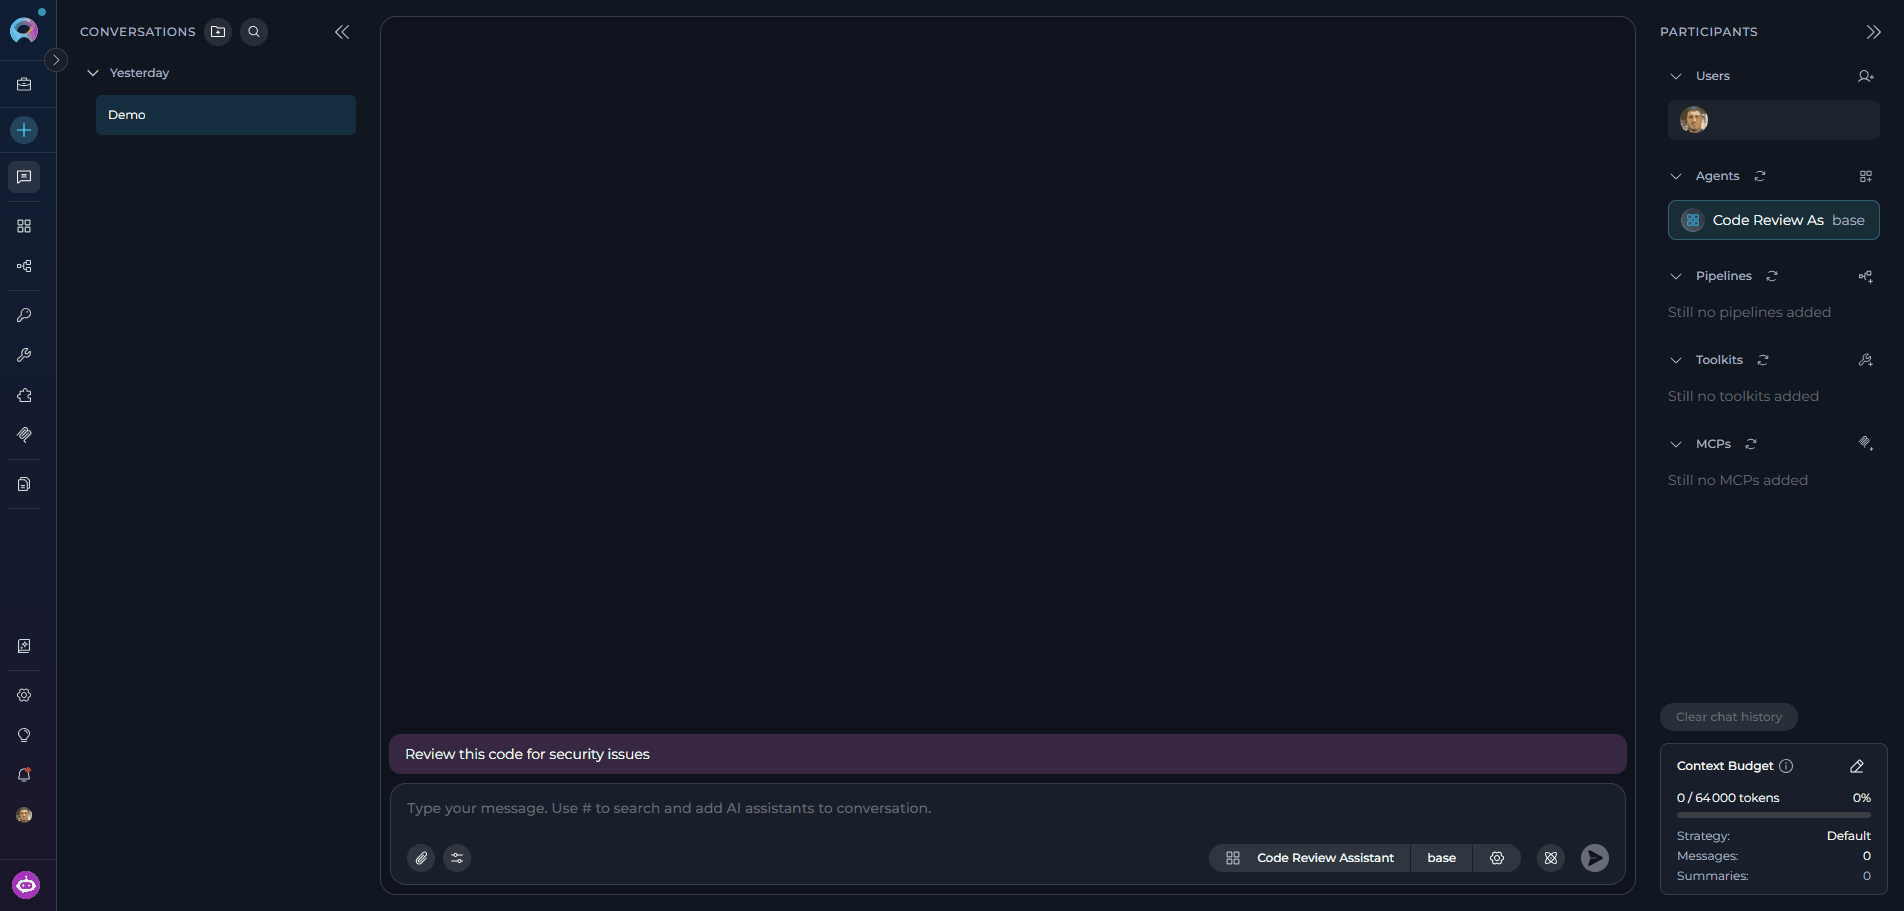
Access agent management directly from the PARTICIPANTS section in chat, maintaining conversation context while managing AI assistants.
Real-time Validation
Configuration fields are validated in real-time, ensuring proper setup before agent creation.
Instant Integration
Created agents are immediately available for use in conversations and can be added to the PARTICIPANTS section.
Advanced Model Configuration
Integration with ELITEA’s LLM model management system for comprehensive AI model selection and fine-tuning.
Internal Tools
Extend agent capabilities with built-in tools such as file attachments, image generation, data analysis, Python sandbox, and more.
Creating Agents via Canvas Interface
Access the Agent Creation Canvas
- Navigate to the Chat page (main sidebar menu).
- In the PARTICIPANTS section, locate Agents.
-
Click on the Create new agent button.
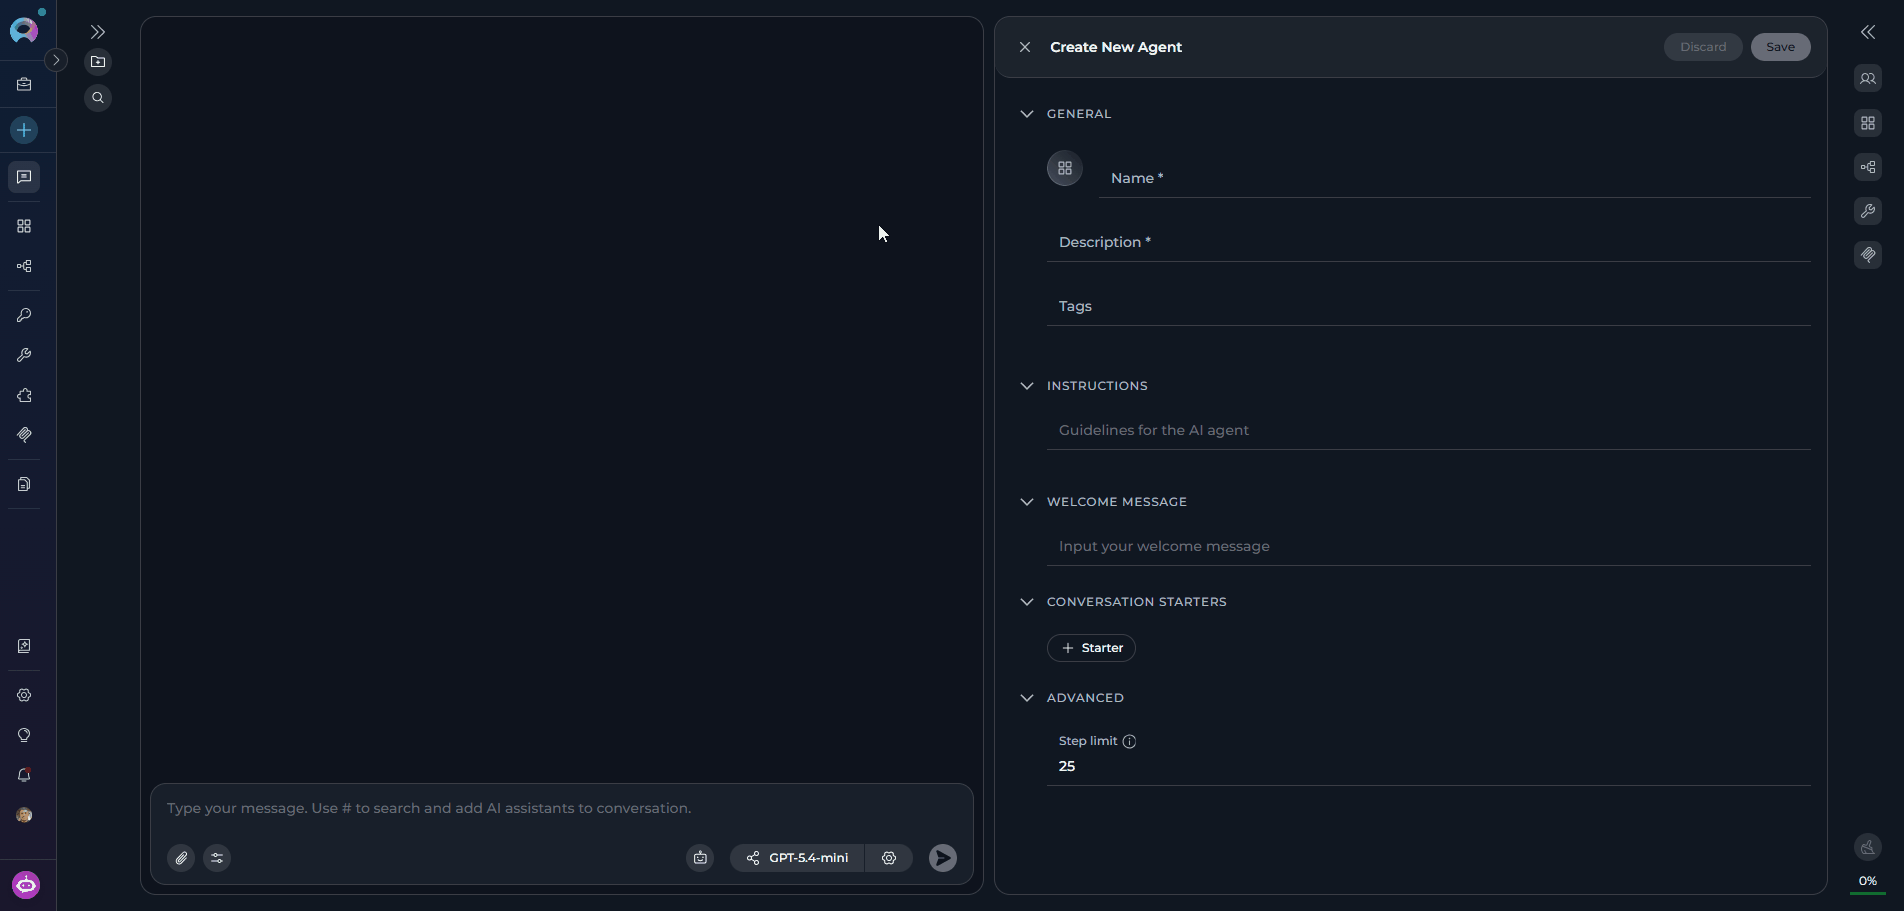
Configure Agent
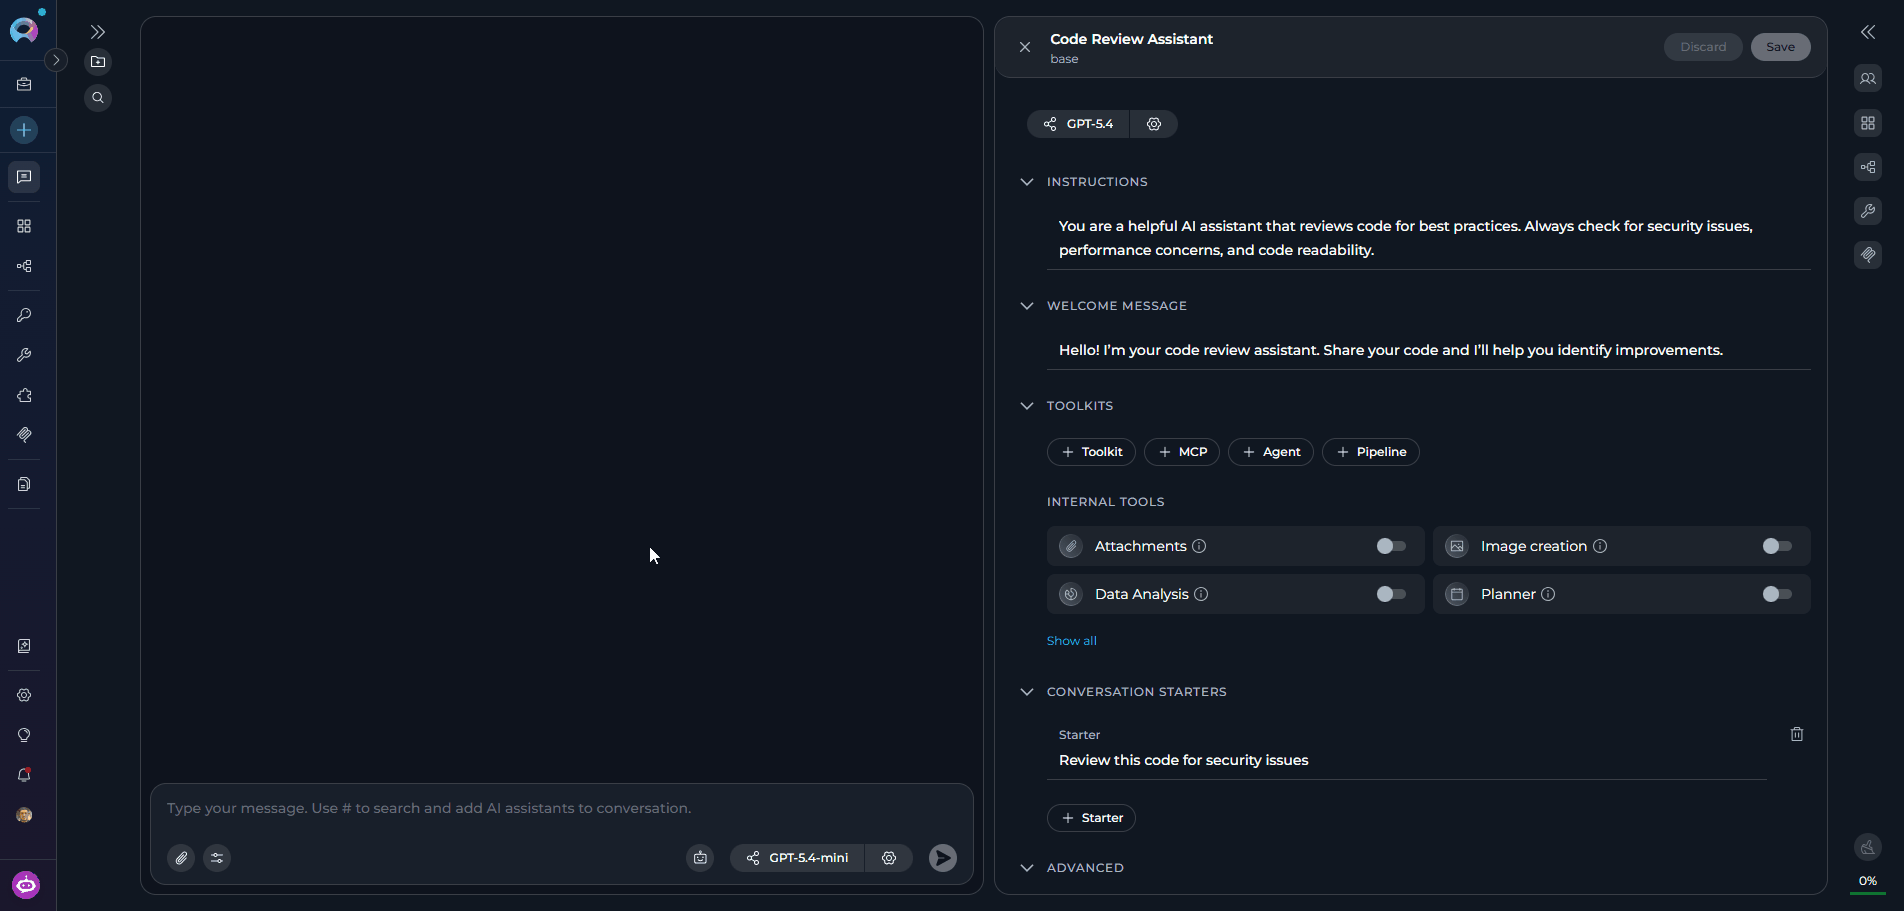
The agent creation form opens with several collapsible sections. Fill in each section as needed:GENERALINSTRUCTIONSProvide detailed guidelines specifying how your agent should behave and what tasks it should perform:WELCOME MESSAGE (optional)Add a message that users see when they first interact with your agent — max 768 characters:
- Name* (required): Enter a unique, descriptive name for your agent — max 32 characters (e.g., “Code Review Assistant”, “Documentation Helper”)
- Description* (required): Provide a clear description of what your agent will do — max 2304 characters
- Tags (optional): Add relevant tags to help organize and categorize your agents
- Icon (optional): Click to set a custom icon for your agent
Required fields are marked with an asterisk * and must be completed before the agent can be saved. The Save button remains disabled until both Name and Description contain valid text.
- Example: “You are a helpful AI assistant that reviews code for best practices. Always check for security issues, performance concerns, and code readability.”
The Instructions field supports
{{variable_name}} syntax. Any variables referenced this way are automatically detected and added to the VARIABLES section, where you can set their default values.- Example: “Hello! I’m your code review assistant. Share your code and I’ll help you identify improvements.”
- Click the + Add button to add conversation starters (maximum 4 starters allowed)
- Enter helpful prompts that guide users on how to interact with your agent — each max 768 characters
- Examples:
- “Review this code for security issues”
-
Step limit: Set the maximum number of steps the agent can execute before ending the loop — valid range 0–999 (default: 25). Click the tooltip icon for more information.
Save Initial Configuration
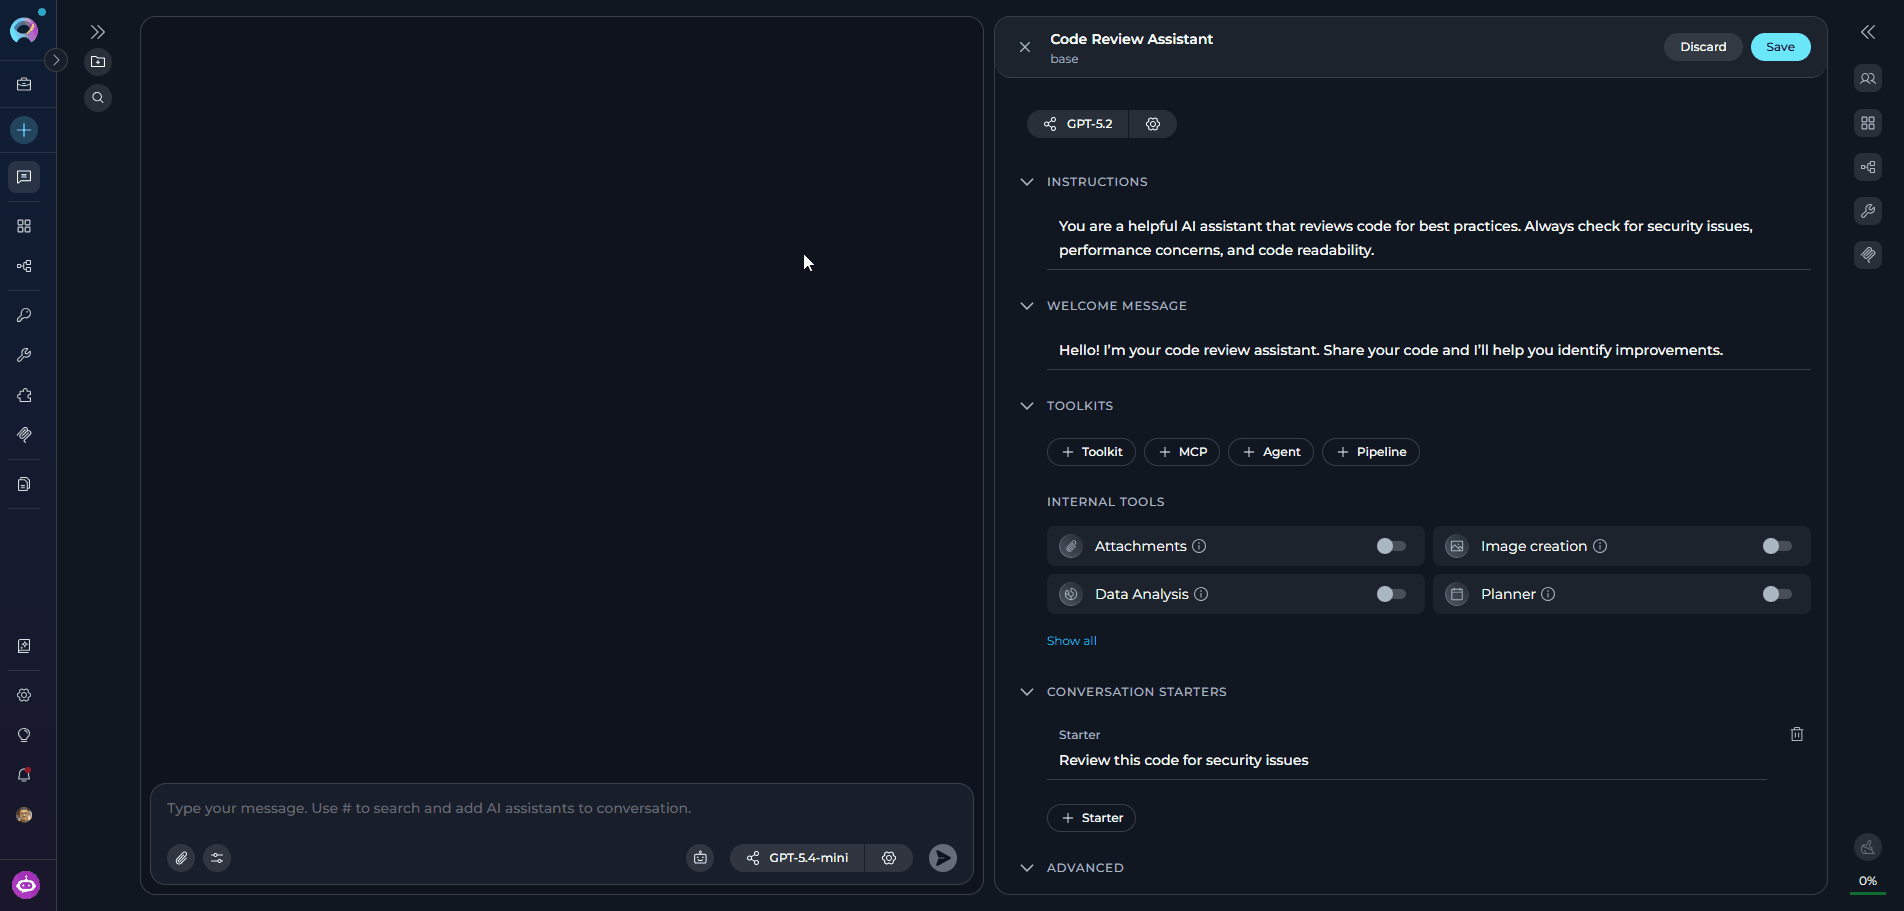
Click the Save button to create your agent. After saving, the canvas transitions to edit mode where the full configuration interface becomes available: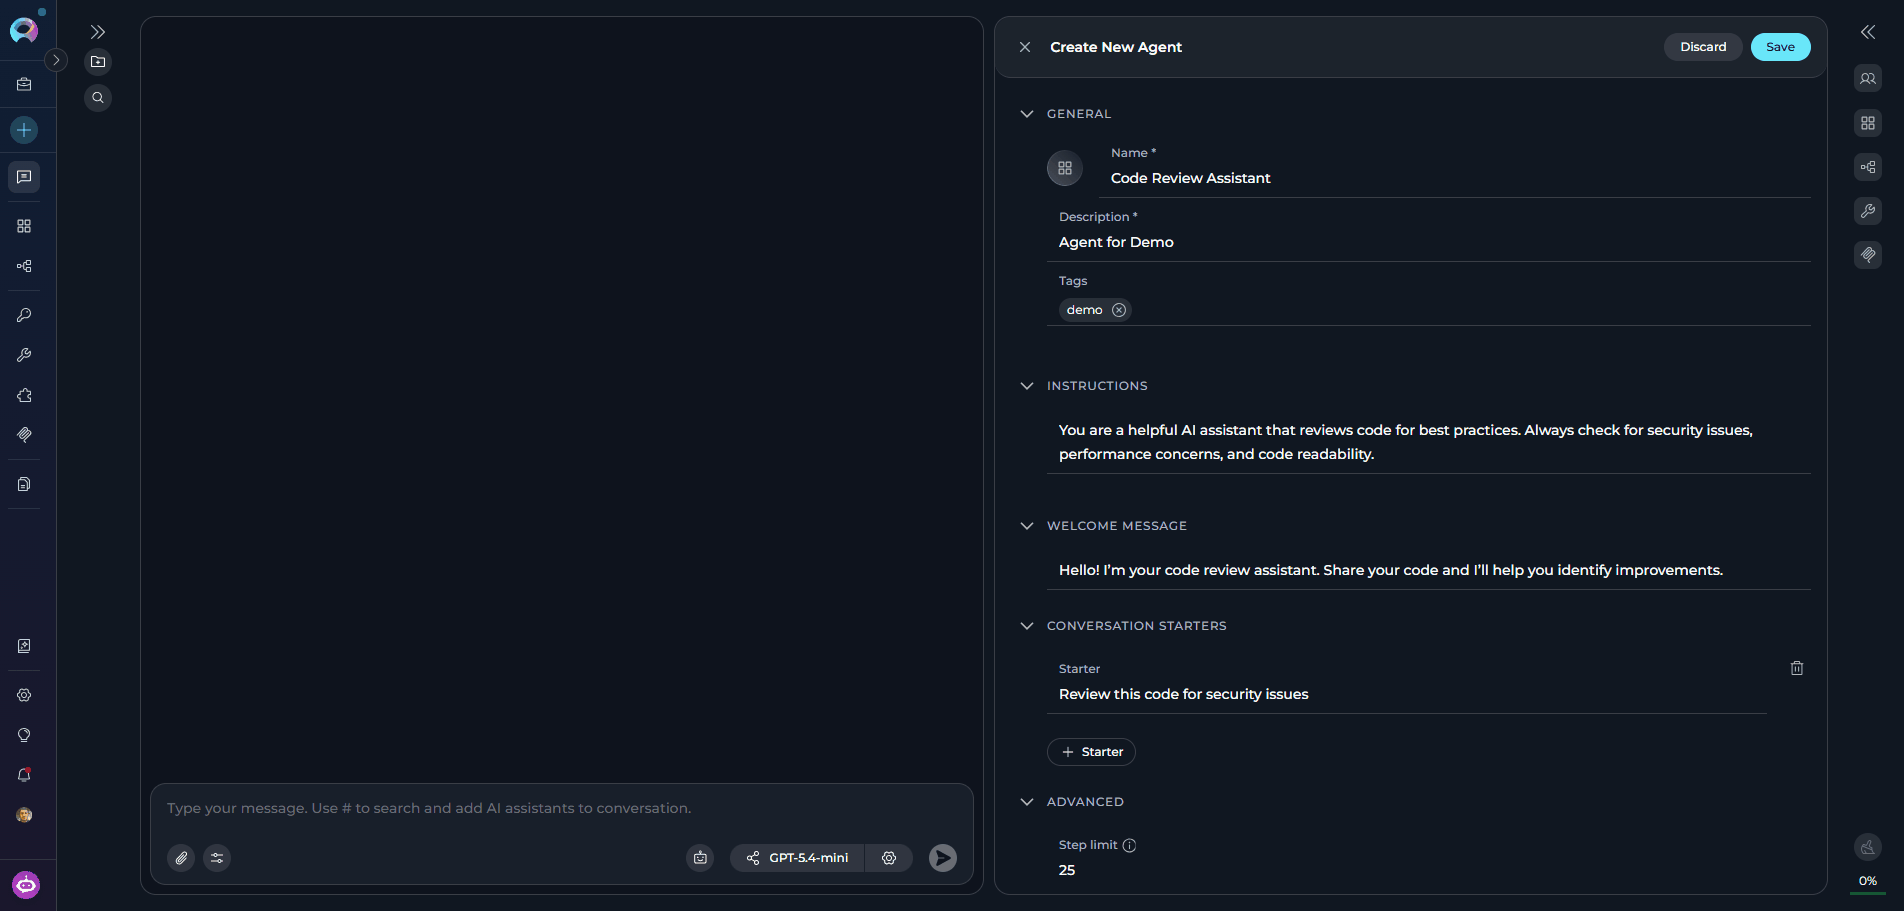
LLM Model Selector
Appears at the top of the panel — select and configure the AI model for your agent.
Integration Buttons
+ Toolkit, + MCP, + Agent, and + Pipeline buttons become active in the TOOLKITS section.
Internal Tools
Built-in capability toggle cards appear in the TOOLKITS section, ready to enable.
Advanced Agent Configuration
After the initial save, the full agent configuration interface is available. Configure the following:LLM Model and Settings
The LLM Model Selector appears at the top of the editor panel in edit mode.-
Model Selection:
- Click the Select LLM Model button to choose from available models in your project (e.g., “GPT-5.2”, “GPT-5.4”)
- The selected model name is displayed on the button
- Models that support image analysis or reasoning show small capability icons next to their name in the dropdown
-
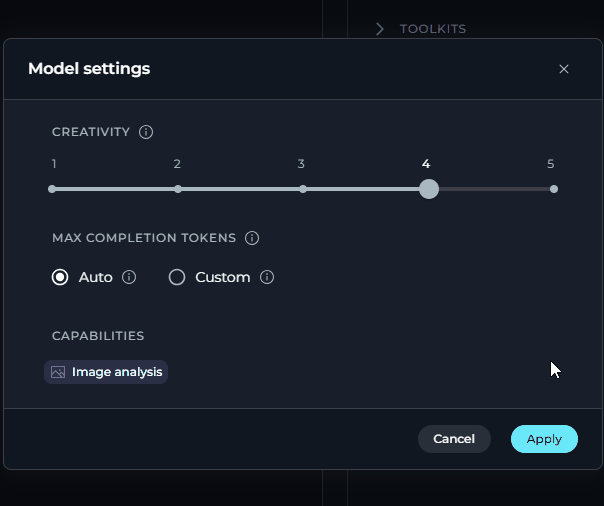
Model Settings:
Click the Model Settings icon (⚙️) next to the model selector to fine-tune response generation. Settings vary by model type:
Max Completion Tokens (All Models)
- Reasoning Models (e.g. GPT-5.1)
- Standard Models (e.g. GPT-4o)
Parameter Description Reasoning Controls depth of logical thinking and problem-solving. Level Behavior Low Fast, surface-level reasoning with concise answers and minimal steps Medium Balanced reasoning with clear explanations and moderate multi-step thinking (default) High Deep, thorough reasoning with detailed step-by-step analysis (may be slower)  Capabilities (shown when supported by the selected model)
Option Description Auto System sets the token limit to 4096 tokens (default) Custom Manually enter a specific token limit. An error is shown if the value exceeds the model’s maximum output tokens. Badge Meaning 
The model accepts image inputs alongside text 
The model uses extended chain-of-thought reasoning Capability badges appear automatically at the bottom of the settings panel based on the selected model. If neither capability is supported, the Capabilities row is hidden.
Toolkits Configuration
In the TOOLKITS section, enhance your agent’s capabilities by adding integrations and enabling internal tools.The + Toolkit, + MCP, + Agent, and + Pipeline buttons are disabled until the agent has been saved at least once. Save the agent first, then add integrations.
- Toolkits
- MCP Connections
- Nested Agents
- Nested Pipelines
- Click + Toolkit to select from available toolkits or create new ones
- Browse and select toolkits like GitHub, Jira, Confluence, etc.
-
A ”+ Create new” option navigates to toolkit creation and returns after completion
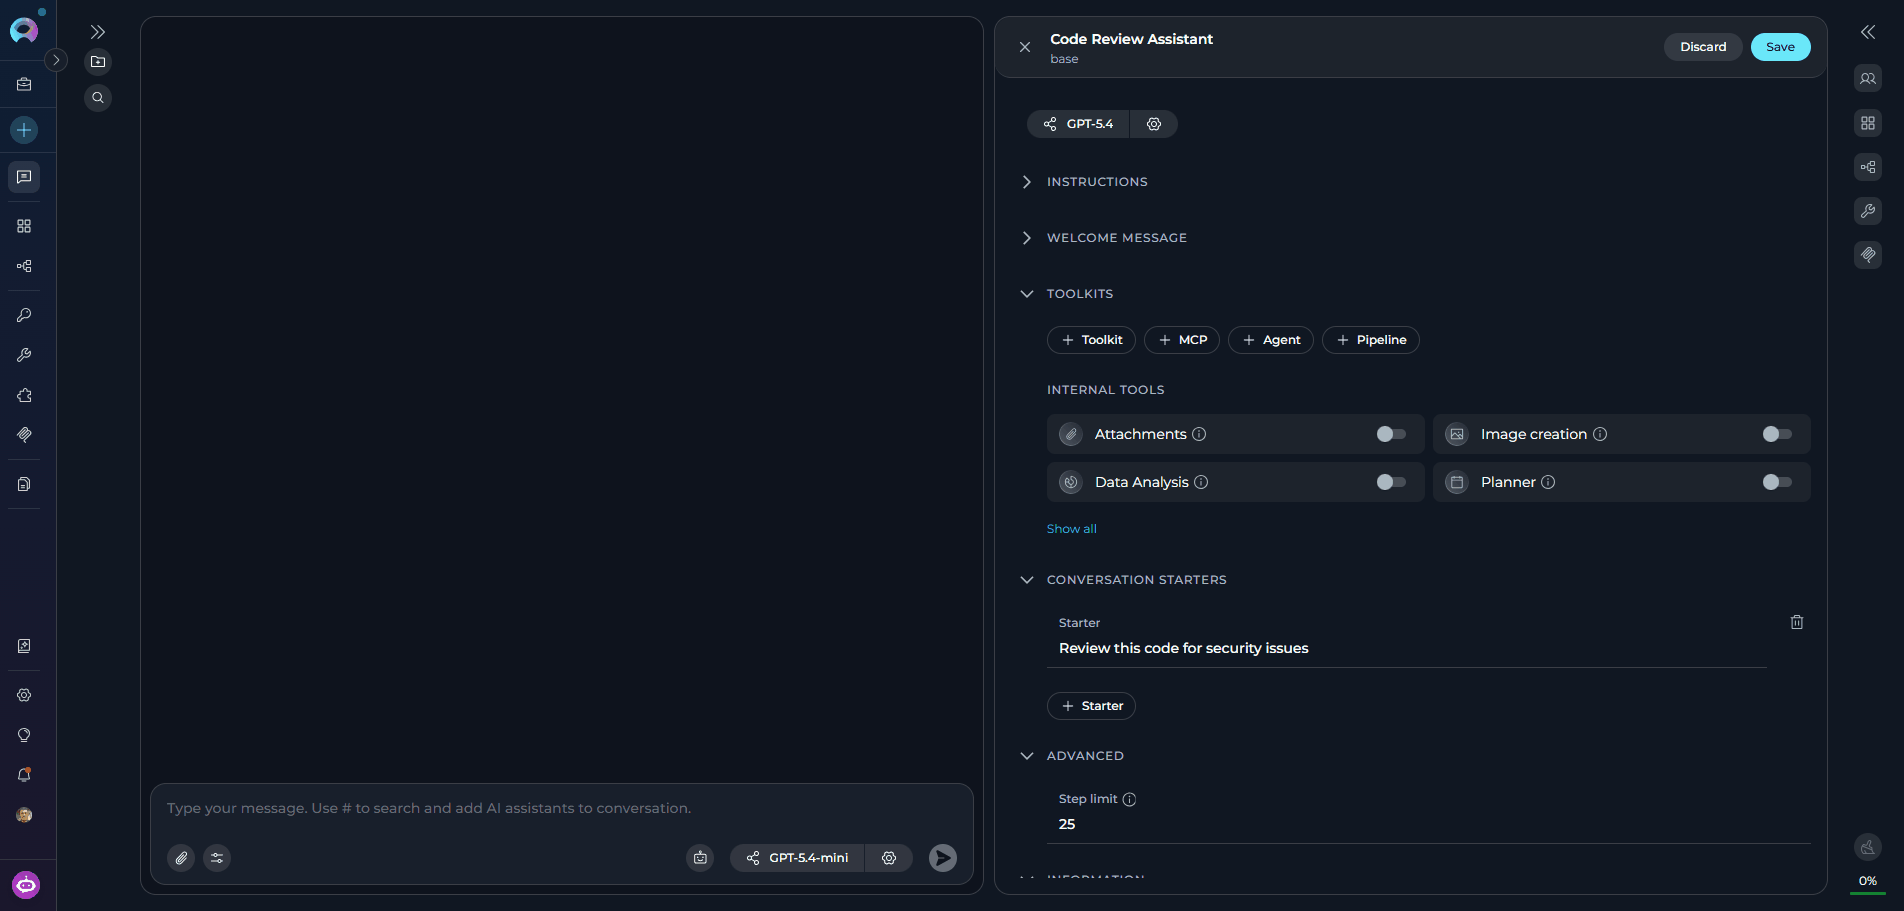
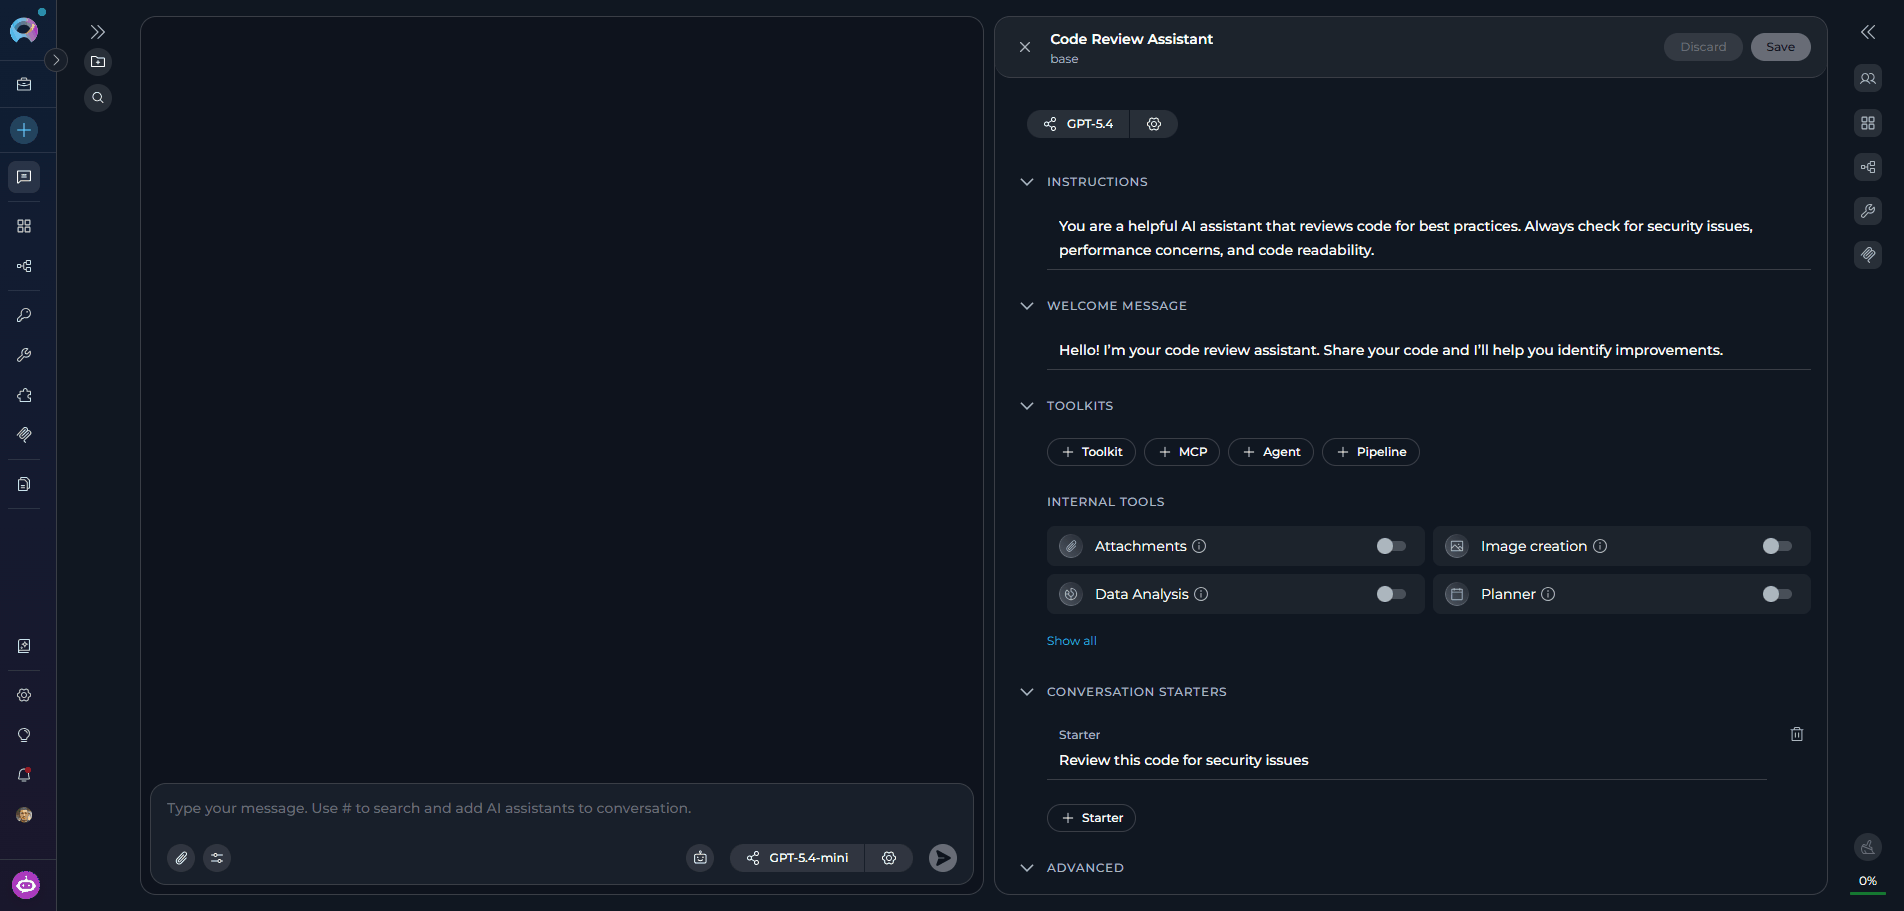
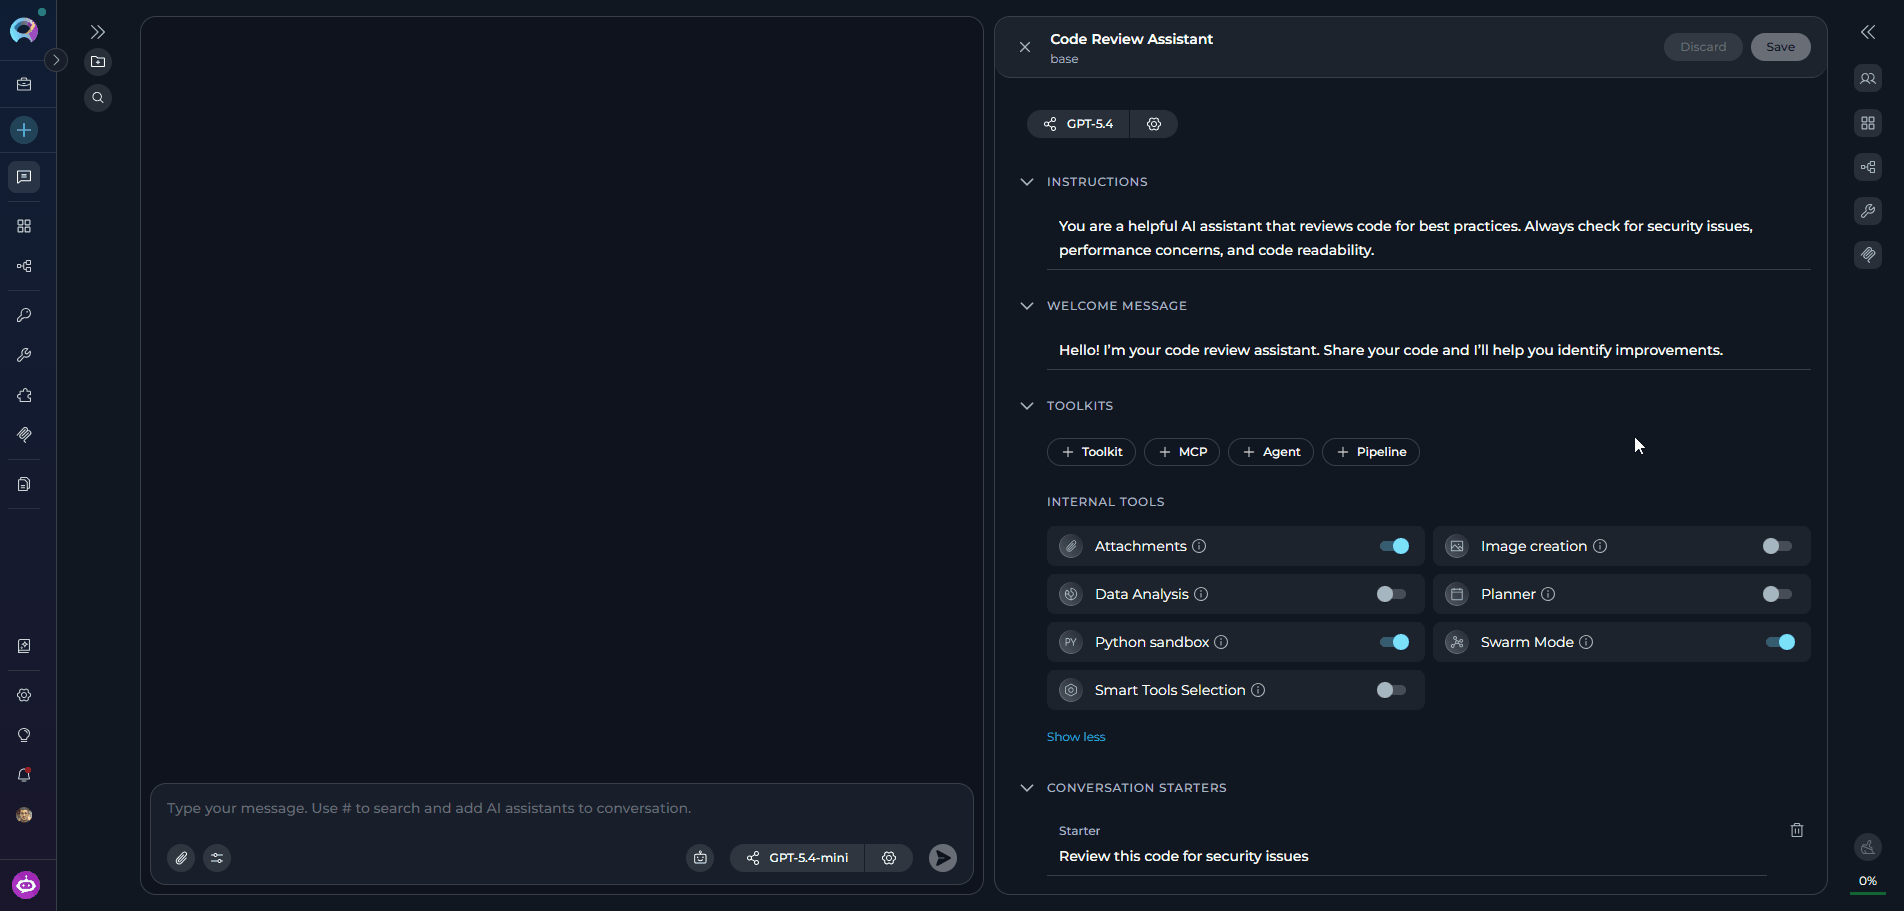
Internal Tools
Below the added integrations, the INTERNAL TOOLS section displays built-in capabilities as toggle cards. Enable these tools to extend your agent’s functionality without needing external integrations:
Attachments
Enable file attachment capabilities for document upload, indexing, and search operations in conversations.
Image Creation
AI-powered image generation directly within the agent conversation.
Data Analysis
Pandas-based data analysis on attached files without requiring a separate toolkit.
Planner
Break work into steps and track progress with a built-in task planning tool.
Python Sandbox
Secure Python code execution via Pyodide for calculations, data processing, and prototyping.
Swarm Mode
Multi-agent collaboration allowing a parent agent to delegate tasks to child agents with shared conversation history.
Smart Tools Selection
Reduces token usage by using meta-tools to discover and invoke tools on demand instead of binding all upfront.
Finalizing Agent Creation
Once you have completed configuring your agent:- Click the Save button to save all configuration changes
- Click the × button to close the canvas interface
Editing Agents via Canvas Interface
Accessing Agent Edit Mode
There are two ways to access the agent edit mode:-
From PARTICIPANTS Section
- Navigate to the Chat page where the agent is available.
- In the PARTICIPANTS section, locate Agents.
- Find the agent you want to edit.
- Hover over the agent to reveal action buttons.
- Click the pencil Edit icon that appears.
-
From Chat Interface
- When an agent is active in your conversation, a ButtonGroup appears in the chat input area showing the agent name, version selector, and a gear icon (⚙).
- Click the gear icon to open the agent configuration panel directly.
- Tooltip reads “Agent Settings” for editable versions, or “Published versions are not editable” for read-only versions.
Modifying Agent Configuration
Once in edit mode, the interface displays current settings pre-populated. You can modify any of the following:Instructions
Update the agent’s behavior guidelines and task definitions. References to
{{variable_name}} automatically update the Variables section.Welcome Message
Change the initial message users see when they start interacting with your agent.
Conversation Starters
Add, remove, or modify starter prompts (maximum 4) that guide users on how to interact with the agent.
Advanced Settings
Adjust the step limit (0–999) and other execution parameters.
LLM Model and Settings
Switch to a different model or fine-tune model parameters including creativity/reasoning level and max tokens. Click Apply after changing settings.
Toolkits and Integrations
Add or remove toolkits, MCP connections, nested agents, and nested pipelines. Toggle internal tools on or off as needed.
Version Management
When editing agents from the chat interface, the ButtonGroup in the chat input area includes a version selector:-
Version Selector:
- The current version name is displayed as a button
- Click the version dropdown to view all available versions
- Select a different version to view or edit it
-
Version Status:
- Draft versions: Can be edited and modified
- Published versions: Read-only; the gear icon shows “Published versions are not editable”

Troubleshooting
Save button remains disabled
Save button remains disabled
Cannot add toolkits, agents, or pipelines
Cannot add toolkits, agents, or pipelines
Problem: Integration buttons are greyed out.
- The + Toolkit, + MCP, + Agent, and + Pipeline buttons are disabled until the agent has been saved at least once
- Save the agent first using the Save button, then add integrations
Model Settings Apply button is disabled
Model Settings Apply button is disabled
Cannot access edit mode for existing agent
Cannot access edit mode for existing agent
Problem: Gear icon shows “Published versions are not editable” or edit icon is missing.
- Published versions are read-only and cannot be edited
- To modify, create a new draft version or edit an existing draft version
- Verify you have the required permissions to edit agents in this project
Changes cannot be saved due to validation errors
Changes cannot be saved due to validation errors
Problem: Save button is disabled or shows an error after attempting to save.
- Review any inline error messages displayed beneath fields
- Ensure all required fields (Name, Description) contain valid values within character limits
- Check that external resources (models, toolkits, agents) are still accessible in your project
Unsaved changes lost after switching versions
Unsaved changes lost after switching versions
Problem: Edits disappeared after selecting a different version.
- Switching versions discards unsaved changes after confirming the warning dialog — this is expected behavior
- Always save your changes before switching to another version
Created agent doesn't appear in PARTICIPANTS
Created agent doesn't appear in PARTICIPANTS
Problem: Agent was created but is not visible in the PARTICIPANTS section.
- Refresh the interface
- Verify the agent was created in the correct workspace/project
- Ensure you are viewing the correct project context
Model configuration changes don't take effect
Model configuration changes don't take effect
Problem: Model settings were closed without applying.
- Reopen the model settings dialog using the ⚙️ icon
- Make your changes and click Apply before closing
- Simply closing the dialog without clicking Apply discards any changes
Variables section is empty or missing expected variables
Variables section is empty or missing expected variables
Problem: Variables defined in Instructions are not appearing in the VARIABLES section.
- Verify the variable syntax in Instructions uses double curly braces:
{{variable_name}} - Variable names are case-sensitive and must not contain spaces
- Save the agent after adding variable references to refresh the Variables section
For additional information and related functionality, refer to these helpful resources:
- Agent Menu - Complete reference for agent management and configuration options
- Chat Menu - Comprehensive guide to chat interface features and navigation
- Credential Menu - Detailed instructions for managing authentication credentials
- AI Configuration - Setup and configuration guide for AI models and settings
- How to Create and Edit Pipelines from Canvas - Similar guide for pipeline management